How to Install a Wall Sconce Electric Box: Step-by-Step Guide
In the event that one intends to fix a wall sconce, it is of utmost importance to secure a wall sconce electric box. Said box is not only tasked with bolstering the sconce’s weight but also ensuring a secure and reliable electrical connection.
Let us delve into the significance of a wall sconce electric box, as well as enumerate the various tools and materials essential to its installation.
To proceed with the task at hand, one requires certain tools and materials. Prior to utilizing these, in the event that one is uncertain of their proper handling, it is recommended to seek the counsel of an electrician for a better installation
Tools Needed:
- Power Drill
- Measuring Tape
- Pencil
- Screwdriver
- Wire Stripper
- Level
Materials Needed:
- Wall Sconce Electric Box
- Electrical Wiring
- Wire Nuts
- Screws
- Mounting Bracket
Explanation of Tools and Materials
| Power Drill | The power drill is used to create a hole in the wall for the wall sconce electric box. |
| Measuring Tape | The measuring tape is used to measure the distance between the wall studs to ensure the correct placement of the wall sconce electric box. |
| Pencil | The pencil is used to mark the location of the wall sconce electric box. |
| Screwdriver | The screwdriver is used to secure the mounting bracket and the wall sconce to the wall sconce electric box. |
| Wire Stripper | The wire stripper is used to strip the electrical wiring to connect it to the wall sconce electric box. |
| Level | This level is used to ensure that the wall sconce is mounted straight away. |
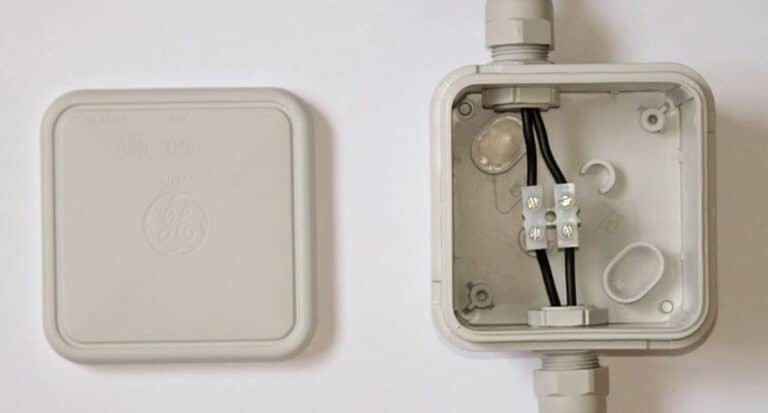
| Wall Sconce Electric Box | The wall sconce electric box is essential because it provides a secure and safe electrical connection for the wall sconce. |
| Electrical Wiring | The electrical wiring connects the wall sconce to the electrical source. |
| Wire Nuts | The wire nuts are used to connect the electrical wiring to the wall sconce electric box. |
| Mounting Bracket | The mounting bracket is used to secure the wall sconce to the wall sconce electric box. |
Preparation
Prior to commencing the installation process, it is imperative to take certain precautions to ensure safety. Begin by disabling the power supply to the area where the installation will take place. This is a crucial step that mitigates the risk of electrical shock. Ensure to disable the power on the main circuit breaker or fuse box.
If you are replacing an outdated fixture with a new wall sconce, it is essential to remove the old fixture before proceeding with the installation. Use a screwdriver to remove the screws that hold the fixture in place. Carefully detach the wiring and set aside the former fixture.
Subsequently, select a location for the new wall sconce fixture. Take into account the room’s height, placement, and overall aesthetic. Ensure that the location is compatible with the wiring and electrical box. It is crucial to select an electric box that can accommodate the weight of the fixture.
What kind of electrical box do I need for a wall sconce?
This is a question that comes up quite often in the world of home improvement and renovation. You can read about all the types of Electrical Boxes in this Article.
Wall sconces require a proper electrical box to ensure optimal safety and functionality during home improvement and renovation. In this article, we will provide you with a comprehensive guide on selecting the appropriate electrical box for your wall sconce.
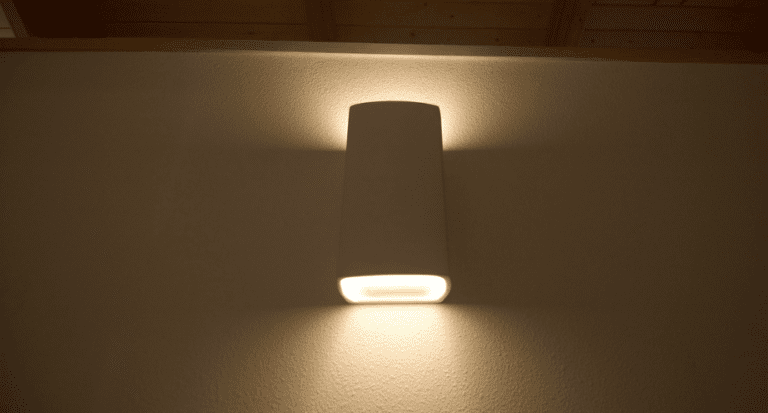
Before we proceed, it is important to establish what wall sconces are. Wall sconces are light fixtures attached to walls and are generally utilized for accent lighting or to augment lighting in various rooms. They come in a vast array of styles and designs and are applicable in various spaces such as living rooms, hallways, and bedrooms.
Let us delve into the different types of electrical boxes suitable for wall sconces. Round and octagon electrical boxes are the most commonly used types for wall sconces.
Round electrical boxes, typically made of metal or plastic, are the more popular choice for wall sconces. They come in varying sizes to accommodate the size and weight of your wall sconce. A 3-inch round electrical box is adequate for smaller and lighter wall sconces while a 4-inch round electrical box is recommended for larger and heavier wall sconces.
On the other hand, octagon electrical boxes are usually used for ceiling fixtures but can also be used for wall sconces. They are typically made of metal and come in varying sizes as well. A 2-1/8 inch deep octagon electrical box suffices for smaller and lighter wall sconces while a 2-1/2 inch deep octagon electrical box is recommended for larger and heavier wall sconces.
It is crucial to note that the National Electrical Code (NEC) has specific requirements for the size of electrical boxes used for wall sconces. The NEC mandates that electrical boxes must be large enough to accommodate the wiring and any additional fittings or devices needed.
How to Install a Wall Sconce Electric Box: A Step-by-Step Guide
Installing a wall sconce electric box is a great way to add style and functionality to your home. In this step-by-step guide, we will show you how to install a wall sconce electric box in a safe and efficient manner.
Step 1: Turn off the Power
First and foremost, before commencing any electrical work, it is imperative to switch off the power from the circuit breaker to avoid any hazards or mishaps during the installation process. Taking safety precautions is always advisable to avoid any unforeseen circumstances.
Step 2: Choose the Location
Next, choosing the appropriate location for installing the wall-mounted luminaire receptacle is crucial to ensure successful installation. The location should be within reach of an electrical outlet or switch, and it should be compatible with the room’s overall design and decor.
Step 3: Mark the Location
After selecting the perfect spot, mark the location using measuring tape and a pencil. Ensure that the marking is centered and level enough to attain a professional and straight appearance.
Step 4: Drill the Holes
To install the electric box, two holes must be drilled into the wall at the marked location using a power drill with a bit that is slightly smaller than the mounting screws. This will guarantee a secure and stable placement of the sconce.
Step 5: Install the Box
Insert the mounting screws through the holes in the electric box and screw them into the wall. Make sure the box is securely fastened to the wall.
Step 6: Connect the Wiring
Connect the cords in the ensuing step. Carefully strip the wires and fasten them to their corresponding counterparts in the electrical container. It is of the utmost importance that the cords are firmly connected, so utilize wire connectors to ensure their stability.
Subsequently, once the wires are secured, tuck them into the electric container and fasten the sconce onto the container.
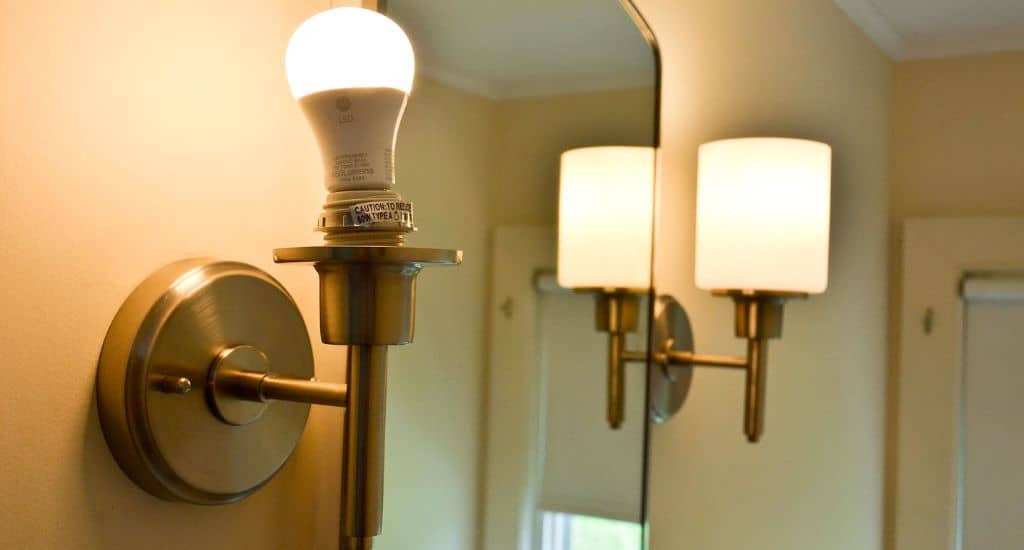
Step 7: Attach the Wall Sconce
After the installation of the electric box and the proper connection of the wiring, the subsequent step is to attach the wall sconce to the electric container.
It is crucial to adhere to the manufacturer’s instructions while undertaking this task to ensure a proper and secure attachment.
Step 8: Turn on the Power
After completing the installation, turn on the power at the circuit breaker and test the wall sconce to ensure it is working properly.
Testing
After installing the wall sconce electric box and attaching the fixture, it is important to test the fixture to ensure that it is functioning correctly. Here are the steps to follow to test the fixture:
1 Turn on the power: Once you have securely attached the fixture to the electric box and attached the cover plate, turn the power back on.
2 Check for any issues: Observe the fixture to see if there are any flickering lights or unusual noises. If there are any issues, turn off the power and double-check that all connections are securely fastened.
3 Test the light switch: Turn the light switch on and off to ensure that the fixture responds correctly.
4 Adjust the position of the fixture: If necessary, adjust the position of the fixture to ensure that it is illuminating the desired area.
5 Enjoy the new fixture: If everything is functioning correctly, enjoy the benefits of your new wall sconces.
The inspection of the fixture is a pivotal phase in the installation process. By adhering to the steps mentioned, you can guarantee that your wall sconce electric box has been mounted accurately and is functioning optimally.
Final Words
The procedure for fitting a wall sconce electric box is straightforward, requiring a minimal number of tools and materials. The steps to undertake involve priming the area, affixing the electric box, linking the wires, securing the fixture to the electric box, and examining the fixture.
It is paramount to adhere to proper safety precautions throughout the process, including shutting off the power supply, donning protective gear, and verifying all connections. By adhering to these protocols, one can guarantee a secure and prosperous installation.
Upon completion of the installation, one must perform a trial run of the fixture to guarantee it is performing appropriately. If everything is functioning in order, one can take pleasure in their new wall sconce.
In a nutshell, fixing a wall sconce electric box can be a simple and fulfilling DIY venture. By following the guidelines put forth in this piece, one can securely and efficaciously install their new fixture.